 Masternode")
This is a tutorial on how to setup a NulleX Masternode. NullTX and NulleX are official partners and NLX is our official cryptocurrency. NulleX is a privacy centric cryptocurrency similar to Dash and PIVX. If you are familiar with how masternodes work with DASH / PIVX, they work pretty much the same with NulleX.
Before we start, keep in mind you do lock away 50,000 NLX in order to start the masternode, at the current price that is roughly $675. The good news is, you do not need any programming experience to set up the masternode. Without further ado, let’s get started.
Contents
- 1 Step 1: Create a VPS and Download Putty
- 2 Step 2: Login to the VPS and add a user
- 3 Step 3: Download and run the install script
- 4 Step 4: Download the Windows-qt wallet, sync it, encrypt it, and send 50,000 NLX
- 5 Step 5: Start the Masternode on the cold wallet
- 6 Step 6: Start the masternode on the hot wallet
Step 1: Create a VPS and Download Putty
We will be using Digital Ocean as our VPS provider, so go ahead and create an account on digitalocean.com. When creating the VPS, make sure it is an Ubuntu 16.04 x64 operating system, NOT Ubuntu 18 or 14. That is important to ensure that the install script works correctly.
Also, make sure to enable IPv6 and Private Networking support, which is important if some time in the future you decide to run multiple NAVs on a single VPS. For simplicity’s sake, for this tutorial we will only set up a single masternode on the droplet.
Once you create the VPS, you will receive an email with information that looks like this:
Droplet Name: nullex-nav-tutorial
IP Address: 142.93.81.140
Username: root
Password: f21ce8da673a5440ff95730d65
Next, download and install Putty from putty.org. This is the program we will be using in order to communicate with the VPS and configure the masternode.
Step 2: Login to the VPS and add a user
Go ahead and run Putty in the host name enter the IP address of the droplet that you received in your email, in our case it will be 142.93.81.140, keep the port at the default value (22). Click open and if you get a Putty Security Alert notification just hit yes, you should then see the following:
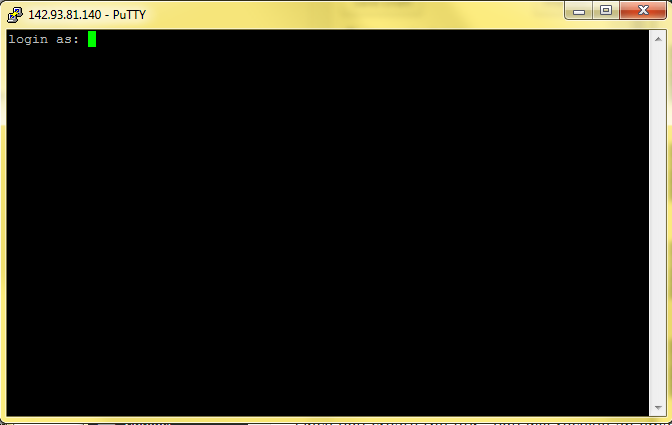
Type in root, then copy past the password that you’ve received in the email. When pasting a string in putty simply right click. You won’t see anything happen in the terminal but that is due to security. Just press enter again and follow the prompts by pasting the password one more time then setting a new password.
At this point you should see something like this:
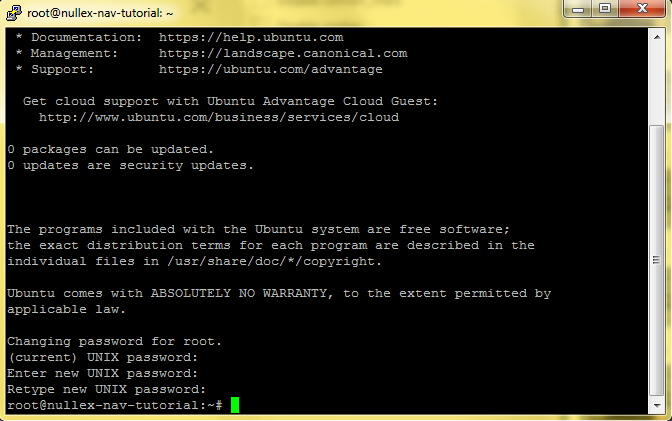
We do not want to be running commands as root, it’s just bad practice. So let’s create a user and give it sudo permission. Run the following 2 commands:
adduser nullexnav1
usermod -aG sudo nullexnav1
Follow the prompt after the first command and once both are complete close the terminal window. Go ahead and start up putty one more time, put the same IP address in the host field, but this time login as nullexnav1 NOT root.
Step 3: Download and run the install script
Big shoutout to Joe Uhren aka NLXionaire from the NulleX Technology Team for creating this script, it makes life so much easier when setting up the masternodes. Run the following commands:
git clone https://github.com/NLXionaire/nullex-nav-installer
cd ./nullex-nav-installer
chmod +x ./nullex-nav-installer.sh
sudo ./nullex-nav-installer.sh -N 4
At this point the install file should begin working and after a minute or two you will be greeted with the following prompt:
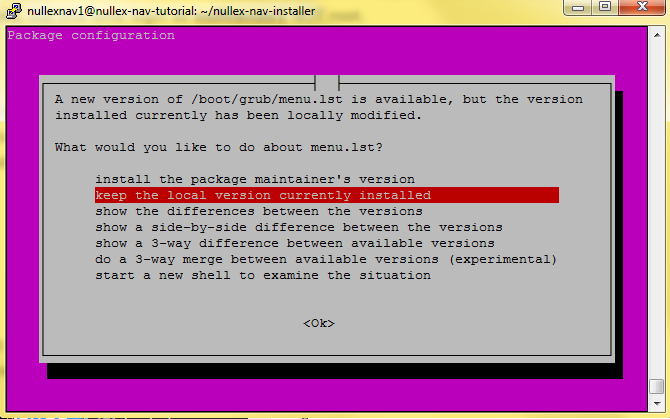
Don’t worry about it, just hit enter with the default selected option. You will see this prompt one more time, once again simply hit enter. Once you are passed that, you will see the script start syncing with the blockchain. At the time of writing it takes about 10-15 minutes to complete. Once the sync is done, you will be greeted with the following:
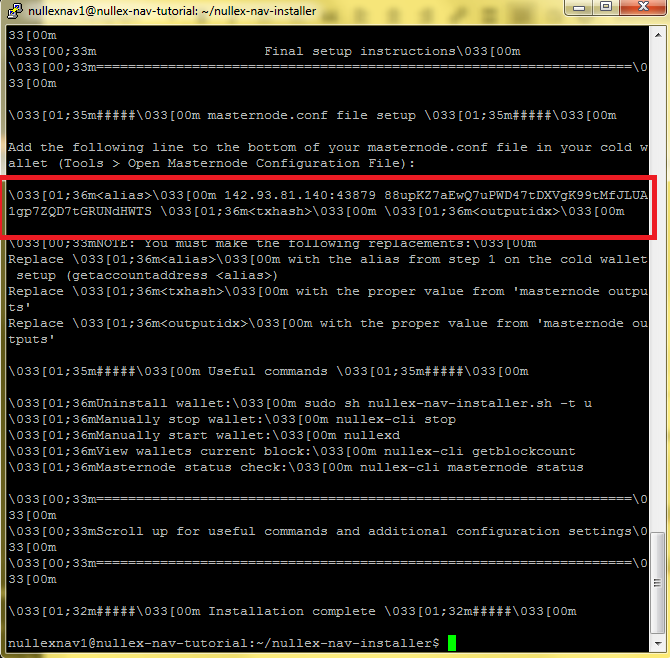
The value we are interested in is the one highlighted. This is the masternode private key, do not share it with anyone. Copy it and save it on a notepad because you will need it later.
In our case the private key is: 88upKZ7aEwQ7uPWD47tDXVgK99tMfJLUA1gp7ZQD7tGRUNdHWTS
Step 4: Download the Windows-qt wallet, sync it, encrypt it, and send 50,000 NLX
This step is pretty self explanatory, download the latest windows wallet from the NulleX website, run it and let it fully sync.
Once the sync is complete, generate a new address. Go to Tools -> Debug Console, and type in the following command to get a receiving address:
getaccountaddress nav1NOTE: You can use any label for the address it doesn’t have to be nav1.

Save the receiving address as that is where you will want to send exactly 50,000 NLX. Before, sending any coins to the wallet make sure that it is encrypted. Go to Settings -> Encrypt Wallet. Make sure to save your passphrase because if you lose it your funds are lost for good.
At this point feel free to send the 50,000 NLX to the previously saved address and wait for the transaction to fully confirm.
Step 5: Start the Masternode on the cold wallet
At this point we are almost ready to start the masternode. Go to the debug console again (Tools -> Debug Console), but this time type the following command:
masternode outputsThe result should be a json string with 2 values, the transaction hash and the output index:
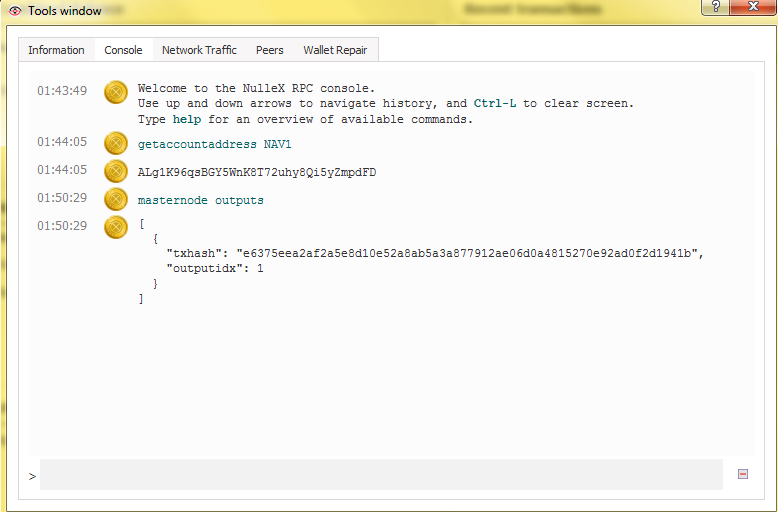
Save both the txhash and the outputidx in the notepad. At this point you should have 3 values in your text file. In our case they look like this:
masternode key: 87d5TTk8t9KpjiMGCnEfWBxKJJKpyL8VMnNYsiQYcz9m3CvUwGh
txhash: e6375eea2af2a5e8d10e52a8ab5a3a877912ae06d0a4815270e92ad0f2d1941b
output index: 1
In your Windows wallet, navigate to Tools -> Open Masternode Configuration File. Open the file using any text editor, I prefer notepad.
This is the configuration file that will link your 50,000 NLX on your windows wallet to the hot wallet on the VPS. You need to add a new configuration line. The first parameter is going to be the masternode alias, it can be anything you want, in our case it is masternode-1. The second parameter is the ip address and port of the VPS that the hot wallet is on, in our case it is 142.93.81.140:43879, the port will always be the same 43879. The third parameter is the masternode private key which we’ve saved above, in our case: 87d5TTk8t9KpjiMGCnEfWBxKJJKpyL8VMnNYsiQYcz9m3CvUwGh. The fourth parameter is the txhash we saved when we ran the command “masternode outputs”, in our case it is: e6375eea2af2a5e8d10e52a8ab5a3a877912ae06d0a4815270e92ad0f2d1941b, last but not least the fifth parameter is our output index which is 1.
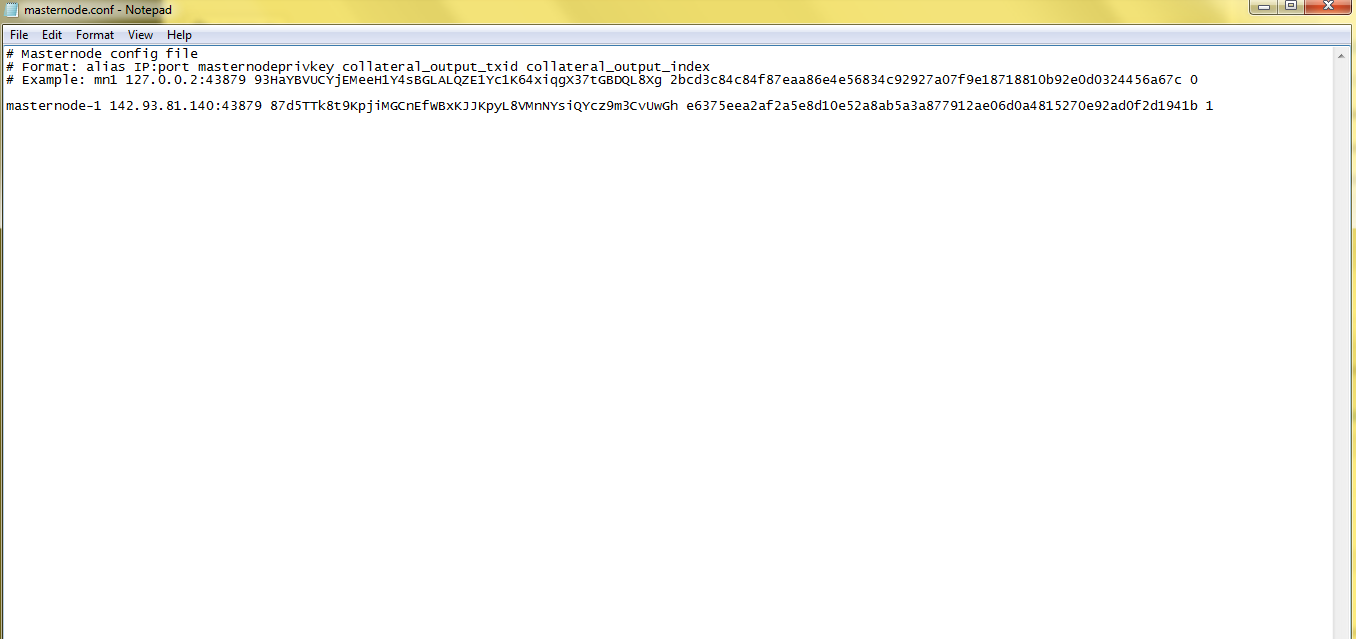
The configuration file should look like the picture above. Save it and close. Then restart the Windows wallet by closing it and starting it again. Let it sync once again and unlock the wallet. Go to Settings -> Unlock Wallet and enter your passphrase.
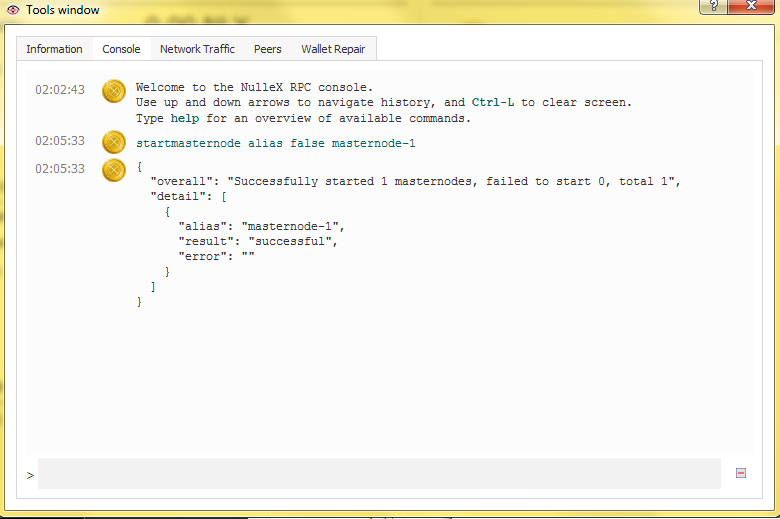
Once the wallet is fully synced and is unlocked, go to the debug console (Tools -> Debug Console), and type in the following command:
startmasternode alias false NAV-ALIASReplace NAV-ALIAS with the alias you put for your nav, you can also find it under the Null Array MN’s tab in the wallet. In our case the NAV-ALIAS is masternode-1.
You should see a success message, this means you are almost there!
Step 6: Start the masternode on the hot wallet
At this point navigate back to your VPS and run the install script one more time:
sudo ./nullex-nav-installer.sh -N 4It will effectively restart the wallet, which will now be able to get linked to the cold wallet. Once the script is finished, to ensure that the masternode is live run the following command:
nullex-cli masternode statusYou should see the following:
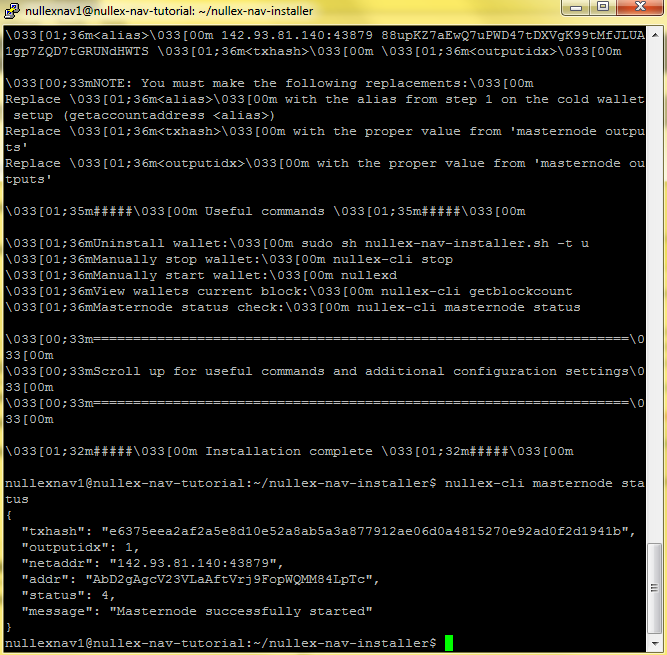
Congratulations! You are officially done setting up your masternode. To really ensure that everything is working properly go to http://nlx.mn.zone/#. This is a website that lists all of Nulex’s masternode. Sort by active time and you should see your masternode at the top. Don’t worry if the port is displayed in orange or white, just give it a few minutes and it should turn green.
That’s it, you are officially done setting up your masternode, it’s a good idea to check up on it once a day or so to ensure everything is running smoothly. Enjoy your rewards and thank you for helping secure the NulleX network!
If you have any questions feel free to leave them in the comment section below. You may also ask questions on NulleX’s telegram channels which you can find below:
NulleX official support channel: https://t.me/NulleXSupport
NulleX official telegram channel: https://t.me/NullexOfficial
Image(s): Shutterstock.com


